


I have got more than a couple PM's as of late so I figured I would post some tips and hints about starting 3D modeling with Blender. I use "cycles render" instead of the default "blender render" engine. I find it easier to work with nodes to apply textures and materials to the 3D model. More on nodes later.
1) DL Blender here: http://www.blender.org/
2) Bookmark these to get started:
https://www.youtube.com/watch?v=5tG2wSNCBmE
https://www.youtube.com/watch?v=f2-FfB9kRmE
https://www.youtube.com/watch?v=H5KcOwCL6RA
With that said, I didn't limit myself just to these. This should get you started. There are a lot of amazing tutorials out there, just google or youtube search "How to ___________ in blender" and you will be surprised. That's how I learned a lot. I would get something done then realize I need this for this model, back to google/youtube, so on.
3) Poly counts:
Keep them as low as possible and use circles and cylinders only when needed. These add tons of polys. Know that you can adjust how many sides they have when you bring in (Shift+A) a new object in blender. Before reshaping/resizing or anything, have all your toolbars up (T and N) and look on the left one, you will see number of sides is 32. The less you have the better poly count but also the less smooth it will be. Find a good trade off.
Delete all unseen polys. For example, you have a big house and a small house connected on one side. You should delete both the bottom faces since the ground is there and will be unseen. You should also delete the smaller houses side that connects to the larger one since it is also unseen.
REMEMBER! You don't have to model everything/every detail. A lot of that can be added in with the texture and proper drop shadows. For instance, a plumbing exhaust line running on the outside of the building. Instead of a cylinder and another 50-100 polys, add this detail in the texture work in photoshop with a drop shadow and bevel/texture options. Then you will see it and it will look 3D from the texture.
4) How to pick a model to work on:
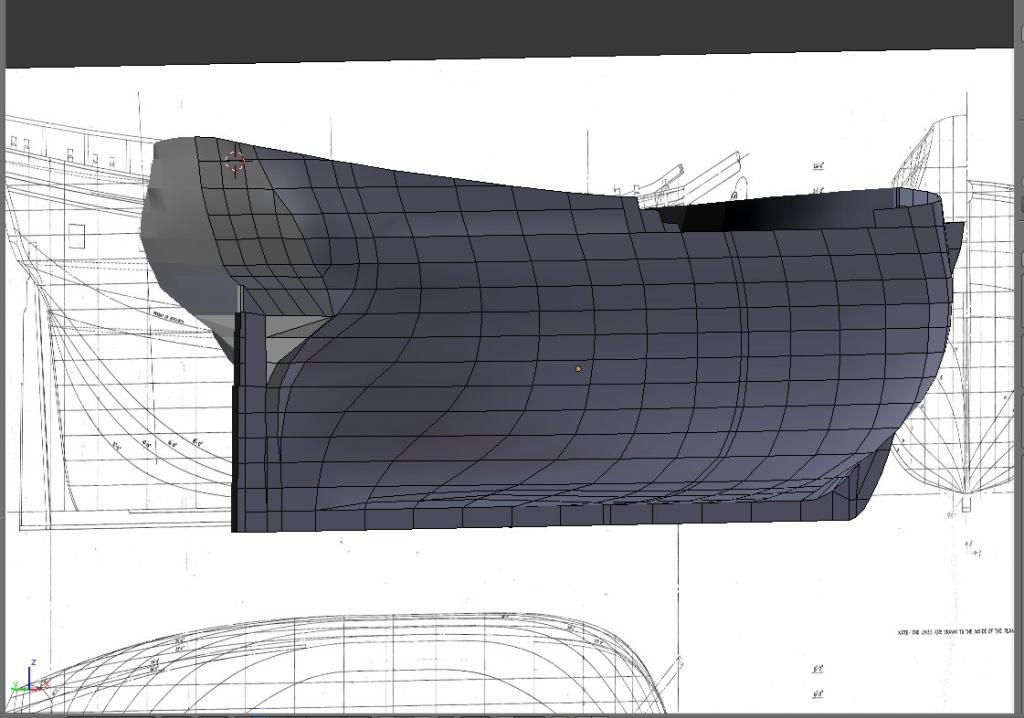
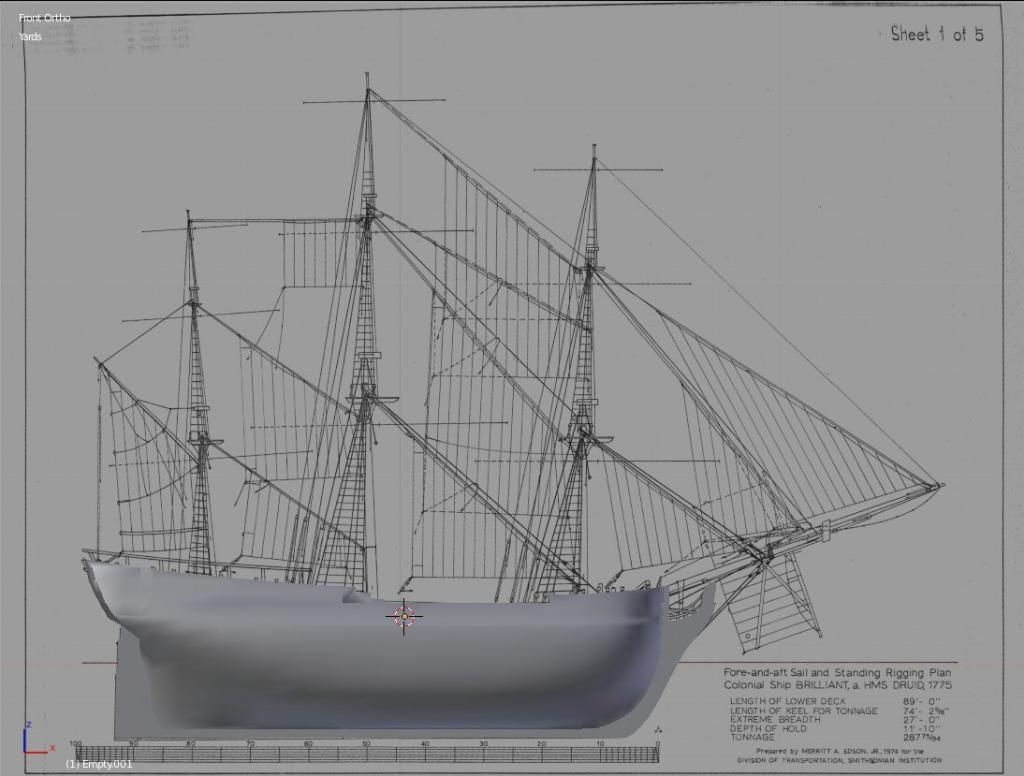
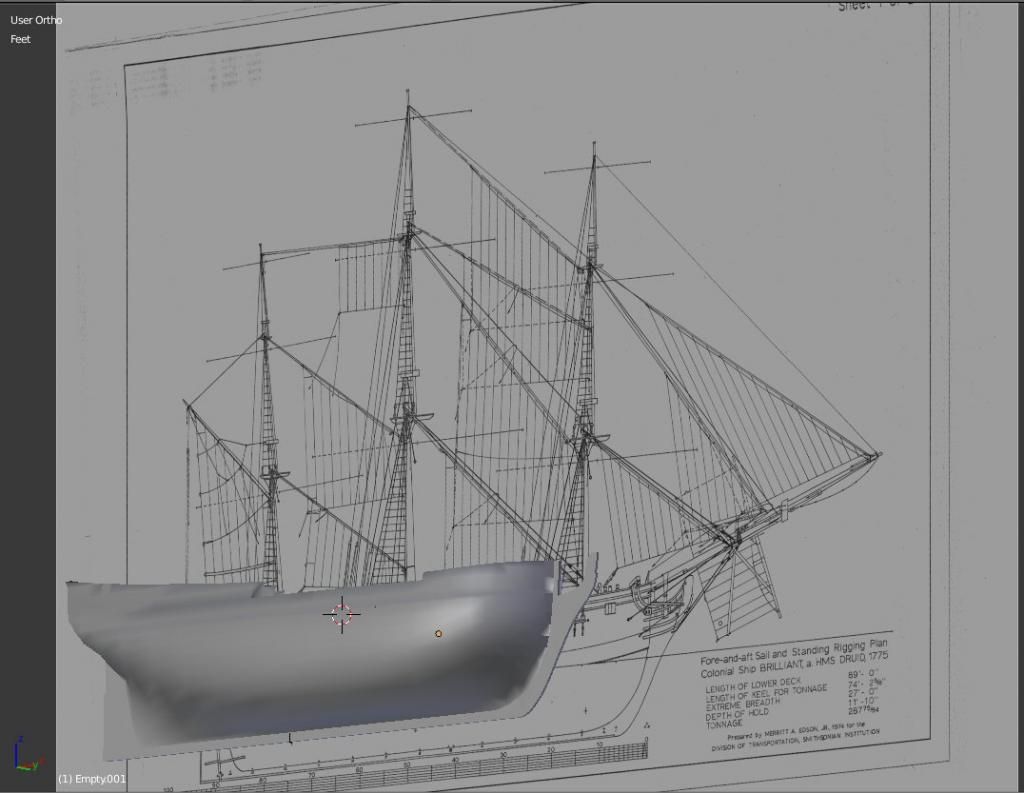
Start simple of course but if you are like me, I lost interest quickly in square houses. Get into CloDs FMB and browse the object list. Think of it from a mission builders PoV. What do you wish you could add and see in CloD? Pillboxes? Train signals signs? Keep it simple but keep it interesting and related to CloD if you can. After that google for photos to use as references. Try to get a scale to look at, proper scale is hard and your eye is easily tricked in 3D programs. Blueprints are key in more complex objects. You can import photos (blueprints) into blender and build on top of them, see here for a good way in doing this: https://www.youtube.com/watch?v=mu9J0D6ebVw (please don't start with a 747)
5) Learn UVmapping/unwrapping:
This is key for texture work. It is hard and better learned through doing. With time and experience you will start to see better progress. I still am honing my skill in this, it is difficult!
7) ALPHA!:
If you saw my control tower from when I was learning, you will notice that the railing was done in Blender, while this is cool and looks good, it is no good for CloD because of poly count. Things like this must be made in Photoshop (or equivalent) by alpha. What do I mean by alpha? Just follow this:
Make your object, in this case a railing, in photoshop by whatever means you use. So in the end we see this:
WTRail.jpg
Then you make an alpha of this, meaning you use your magic wand in PS and select all of the background, then go to select, inverse selection so now the railing is all highlighted. Then you get your brush out and paint over all the texture to make it all white. Then go back up to select, inverse selection again so now the background is selected, and paint all that black. You are left with this: By using the magic wand process you can quickly do this rather than carefully trying to paint. Make your brush 300 size and done.
WTRailAC1.jpg
Then you save that alpha separately! So you should have something like railing.jpg and railingA.jpg
Then we get to the point of using these in Blender, here is a quick and dirty example. The links above have some good info and a step by step video so I suggest using them and just reading this to get a taste.
Again, this way will only work in "Cycles Render" engine.
These are the steps: (In Blender)
File-import-images as planes (IF THIS ISNT AN OPTION YOU NEED TO DO THIS: File, Userpref, click on addons tab, then look for import/export-images as planes. Its about half way down. Click the box to make this active. Then save. I suggest reading into these, there are other things worth clicking on that are above and beyond this post)
Next, find where your railings.jpg was saved and select it, the one with texture and hit return. Now you see this:
Screen shot 2014-11-18 at 4.10.26 PM.png
No image! Now you'll need to do is this:
Screen shot 2014-11-18 at 4.10.37 PM.png
Then select "material" and it will render the image with the material/texture on the plane.
Screen shot 2014-11-18 at 4.10.42 PM.png
Now adjust your plane to however it should be by means of XYZ axis. Now the hard part!
Go into UV editing:
Screen shot 2014-11-18 at 4.13.24 PM.png
Then go into the node editor by clicking on that little colored photo in the bottom left:
Screen shot 2014-11-18 at 4.14.06 PM.png
Now you see this:
Screen shot 2014-11-18 at 4.15.03 PM.png
Click on the image texture box, the one furthest on the left and duplicate it (shift+D), moving it just above the other one. Like this:
Screen shot 2014-11-18 at 4.16.06 PM.png
Now on the new node you just added, click on the folder icon and search for the ALPHA image of your railing, so in my case railingA.jpg and click enter.
Next, we have to add a couple more nodes and link them properly for the Alpha to work its magic. Go to the ADD on the bottom, go to shader, then at the top you'll see "mix shader", select it. Then link it up to the other nodes like this photo:
Screen shot 2014-11-18 at 4.19.42 PM.png
Now, go back to ADD, and to shader, and select the transparent BSDF. Then place that node here:
Screen shot 2014-11-18 at 4.21.16 PM.png
Now we need to attach this this way:
Screen shot 2014-11-18 at 4.23.28 PM.png
Still not good! Now do this last connection (see image below) and voila!
Screen shot 2014-11-18 at 4.25.41 PM.png
This is how you do alpha work in cycles render in blender. The possibilities are endless with alpha and saves countless polys. Instead of a railing built in blender with cylinders that have 20,000 polys, we use the above technique and we get that number down to about 20.
That is all for now, keep your PM's coming if you have questions, I will help out where and when I can.


 Reply With Quote


 By ATAG_Lewis


Bookmarks